

How to Start Indoor Cycling Without Feeling Lost

The room goes dark, the playlist comes up, and suddenly everyone seems to know exactly what to do. If you are wondering how to start indoor cycling without feeling like the only person who missed the memo, start here: nobody expects your first ride to look polished. Your first job is simply to show up, get comfortable on the bike, and move at a pace that feels right for your body.
Indoor cycling can be a sweaty, music-led reset after a long workday. It can also feel intimidating when the instructor calls out positions, resistance changes, and rhythm cues you have never heard before. The good news? You do not need experience, special coordination, or race-level fitness to enjoy it. You just need a little setup know-how and permission to take it one song at a time.
How to Start Indoor Cycling: Your First-Ride Plan
Book a beginner-friendly class when you can, and arrive 10 to 15 minutes early. That extra time makes a real difference. Tell the front desk team or instructor that it is your first ride, even if you feel a little shy about it. A rider-first studio will be happy to help adjust your bike and explain the basics without making a big deal of it.
Wear clothes you can move and sweat in. Leggings, shorts, a tee, or a tank all work. Many studios provide cycling shoes that clip into the pedals, while others may allow sneakers with pedal cages. Either option is fine for a first class. Bring water and a small towel, because indoor cycling gets warm quickly and hydration is not optional.
You do not need to buy padded shorts, a heart-rate monitor, or a closet full of workout gear before your first class. Those extras can be useful if riding becomes part of your routine, but they are not a ticket into the room. Start simple. See how the class feels first.
Set Up Your Bike Before the Music Starts
A well-adjusted bike is the difference between a challenging workout and an uncomfortable one. Ask for help if you are unsure. It is much easier to make a small adjustment before class than to spend 45 minutes wondering why your knees or lower back feel awkward.
Find the right seat height
Stand beside the bike and bring the saddle roughly level with the top of your hip. Once seated, place one foot at the bottom of the pedal stroke. Your knee should have a soft bend, not be completely straight and not feel tightly folded.
If your hips rock from side to side as you pedal, the seat may be too high. If your knees feel crowded toward your chest, it may be too low. Small changes matter, so adjust in short increments.
Check your forward and handlebar position
With the pedals level, your front knee should sit roughly over the middle of your foot. You should be able to reach the handlebars with relaxed shoulders and a gentle bend in your elbows. Avoid locking your arms or hunching your shoulders toward your ears.
New riders often prefer handlebars set a little higher. That is completely okay. A higher setup can reduce strain on your back and make it easier to focus on learning the ride. You can refine your position later as your comfort grows.
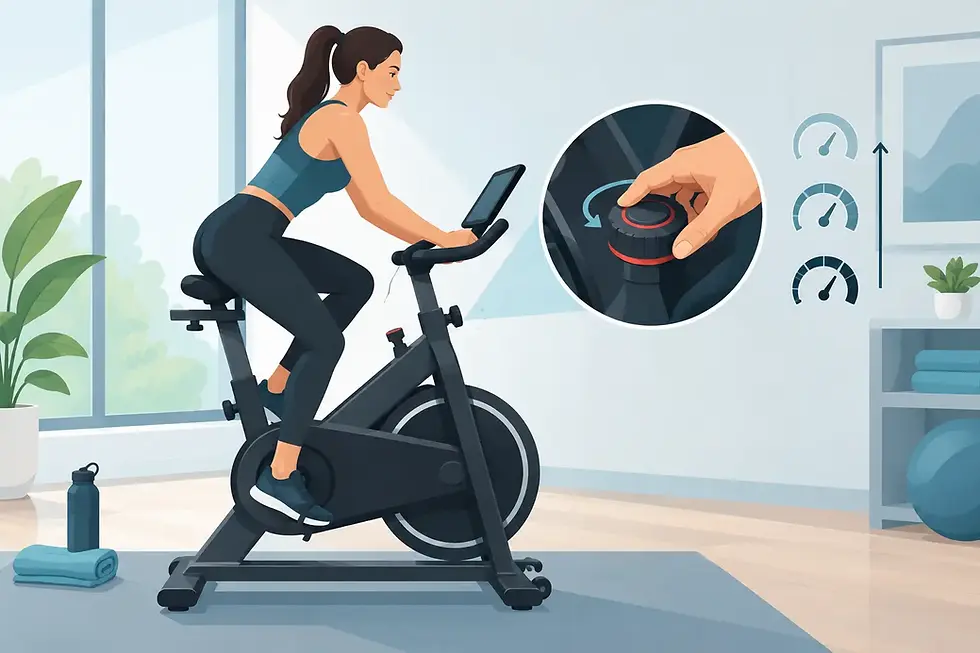
Learn the resistance knob
The resistance knob is your control center. Turn it right to add resistance and left to reduce it. In most studio rides, you should always feel some resistance under your feet. Pedaling with zero resistance can make your legs move too fast and reduces your control.
Think of resistance as the road beneath you. A little resistance is a flat road. More resistance feels like a hill. You get to decide how steep that hill is, regardless of what the rider beside you is doing.
Follow the Cues, Not the Competition
Indoor cycling classes are often built around music, so instructors may cue a beat, a climb, a sprint, or an out-of-saddle section. At first, it can feel like learning a new language. You do not need to nail every cue.
If the instructor says to increase resistance, add a small amount and notice how it feels. If they ask riders to stand and you are not ready, stay seated. If the pace becomes too quick, slow down while keeping enough resistance to stay steady. No pressure. Good form and body awareness matter more than matching every movement.
When you do ride out of the saddle, keep your weight light in your hands and strong through your legs. Your core should support you, rather than letting your upper body hang on the handlebars. If standing feels wobbly, return to the saddle. That is a smart adjustment, not a failure.
It also helps to let go of comparison early. Some riders will look effortless because they have taken many classes. Others may be returning after time away, managing an injury, or simply having a harder day. Your ride is personal. The most useful question is not, “Am I keeping up?” It is, “Can I keep moving with control?”
Pace Yourself for the Whole Class
The biggest beginner mistake is going all out in the first few songs. The music is exciting, the energy is high, and it is easy to treat every sprint like a final push. Then your legs are done before the midpoint.
Start at what feels like a manageable effort, even if you think you could go harder. Use the first part of class to settle into your breathing, learn the instructor’s style, and get familiar with the bike. You can always add more resistance later. It is harder to recover when you have pushed too much too soon.
A simple effort check can help. During easier sections, you should be able to say a short sentence. During tougher intervals, speaking should feel more difficult, but you should not feel dizzy, sharp pain, or completely out of control. If you do, lower the resistance, sit down, and take a few deeper breaths.
Sweating a lot is normal. Feeling faint, nauseated, or painful is not something to power through. Pause, hydrate, and let an instructor know if you need support. Listening to your body is part of training.
What to Expect After Your First Ride
Your legs may feel pleasantly heavy afterward, especially your quads, glutes, and calves. If you are new to cycling, some muscle soreness the next day is normal. A gentle walk, light stretching, water, and a solid meal can all help you recover.
You may also notice some saddle discomfort after your first few rides. This is common as your body adapts, but your bike setup and riding form should never cause sharp pain or numbness. Ask an instructor to recheck your position before your next class. If soreness persists, give yourself recovery time and consider whether a padded cycling short would make longer rides more comfortable.
For your first month, one or two rides a week is plenty. That frequency gives your body time to adapt while helping you build confidence. If you are already active, you may want more, but balance harder rides with rest days or lower-intensity movement. Progress does not come from making every class your toughest class.
Make Indoor Cycling a Habit You Actually Want
The best workout is the one you look forward to repeating. For some people, that means choosing a class with a playlist they love. For others, it means booking with a friend, picking a convenient time after work, or making the ride part of a weekend plan.
At Sync Cycle in Serangoon, the idea is simple: smile, sweat, sing. A music-driven room can turn a workout from another item on your to-do list into an hour that belongs to you. But the same principle applies wherever you ride. Find an environment where you feel welcome enough to be a beginner and energized enough to come back.
Do not wait until you feel “fit enough” to book your first class. Indoor cycling is not a test you need to pass before joining. Set up your bike, take the resistance you can handle, and let the next song carry you forward.


Comments